I have been sponsoring a wonderful blog called A Proverbs 31 Wife. Today she did a feature on my crafty sewing business. Go check out her post! http://aproverbs31wife.com/designs-by-a-rose-feature-and-giveaway/
While you're there, check out some of her other posts. She writes about everything from cooking to budgeting.
Hugs!
A.Rose

Saturday, February 23, 2013
Thursday, January 10, 2013
Saturday, December 29, 2012
4 years!
Wow! Can't believe it's been 4 years since I started this little blog. Happy bloggy anniversary to me! Thank you to all the followers who have stuck with me and hello to my new followers. It makes me smile every time I see a new face pop up!
I have been pretty sporadic in my posting, but my plan for 2013 is to spend a little more time on this blog. I had this same goal last year, but a very hard pregnancy threw me for a loop. With my family complete, I want to document more of our adventures, my sewing business creations, and my crafty projects. If there is anything you're interested in seeing, please let me know.
I hope everyone had a very merry Christmas!!!
Annette
I have been pretty sporadic in my posting, but my plan for 2013 is to spend a little more time on this blog. I had this same goal last year, but a very hard pregnancy threw me for a loop. With my family complete, I want to document more of our adventures, my sewing business creations, and my crafty projects. If there is anything you're interested in seeing, please let me know.
I hope everyone had a very merry Christmas!!!
Annette
Thursday, August 2, 2012
Pinned it - Did it - Baby steps onesie
As I said before we're expecting a baby in November, it's a boy!
Since we're huge hockey fans, I had to make this onesie when I found it online! Of course...I pinned it!

I made my design in Microsoft Publisher and saved it as a jpeg. Then flipped the design so it would show up backwards and printed it on fabric transfer paper. (You have to flip the design before printing...otherwise it will transfer backwards. I may or may not be telling you from experience...)
Here is my version:

So excited for our sweet boy to wear this!
Wednesday, August 1, 2012
Pinned it - Did it! American Flag T-shirt
I decided I wanted to start a new series. I'm not sure which day of the week this will end up, but I have a huge obsession with Pinterest...I mean HUGE! I have 1,000s of pins in just my sewing projects board!
Here is my first installment of the Pinned it - Did it! series. The American Flag T-shirt.

I made this for my baby girl, Scarlett, on the 4th of July, but since I've been a loser in the posting department, you're getting it at the first of August!
I have no idea where the original pin came from...the one I pinned is just a pic, with no tutorial or even where to buy, so I had to make my own tutorial.
I started with a kid's t-shirt, red large rick rack and polka dot blue grosgrain ribbon.

I cut 1 short strip and 2 longer strips of the rick rack, just eyeballing it. Since this was for a 10 month old, I had to size it down. The original pic has 4 strips of rick rack.

After I had them where I liked, I pinned and sewed them in place.

Made a cute boutique bow out of the polka dot ribbon and hand sewed it on. (making sure it was attached very well as my baby loves to chew on ribbon)

I think it turned out great. Here is the original pic for comparison:
Tuesday, July 31, 2012
Ribbon petal flower tutorial

A friend sent me this pic of a flower hairbow she was trying to make.

(I have no idea where the pic came from, so if you know please let me know so I can give the appropriate credit.)
She wanted to attempt her own version, but was having a hard time with it. I played around to see if I could make it and here is what I came up with.

If you want to attempt your own, you will need the following: 1/4" grosgrain ribbon, needle, thread, hot glue gun and hot glue, small piece of felt, hair clip, and something to embellish the top. The original pic used a pearl button, I used a premade ribbon flower.

Start by cutting 8 strips of ribbon at 4", 8 strips at 3 1/4" and 8 strips at 2 1/4".

Take one strip of each size and line up at one end. You will use your need and thread at this point. Run the need through the end that is lined up. Pull the shortest piece over and run the needle through, follow with the middle piece and finally the longest piece.
Here it is with just the 3 pieces lined up...

Shortest piece pulled over...

Middle piece added...

Finally, the longest piece...

Once you have all the pieces on the needle, run a few stitches through to hold it together.

Finger press the pieces so that the folds are creased. This is not super important, but gives the point at the petals versus a rounded petal.

Continue until you have 8 petals...
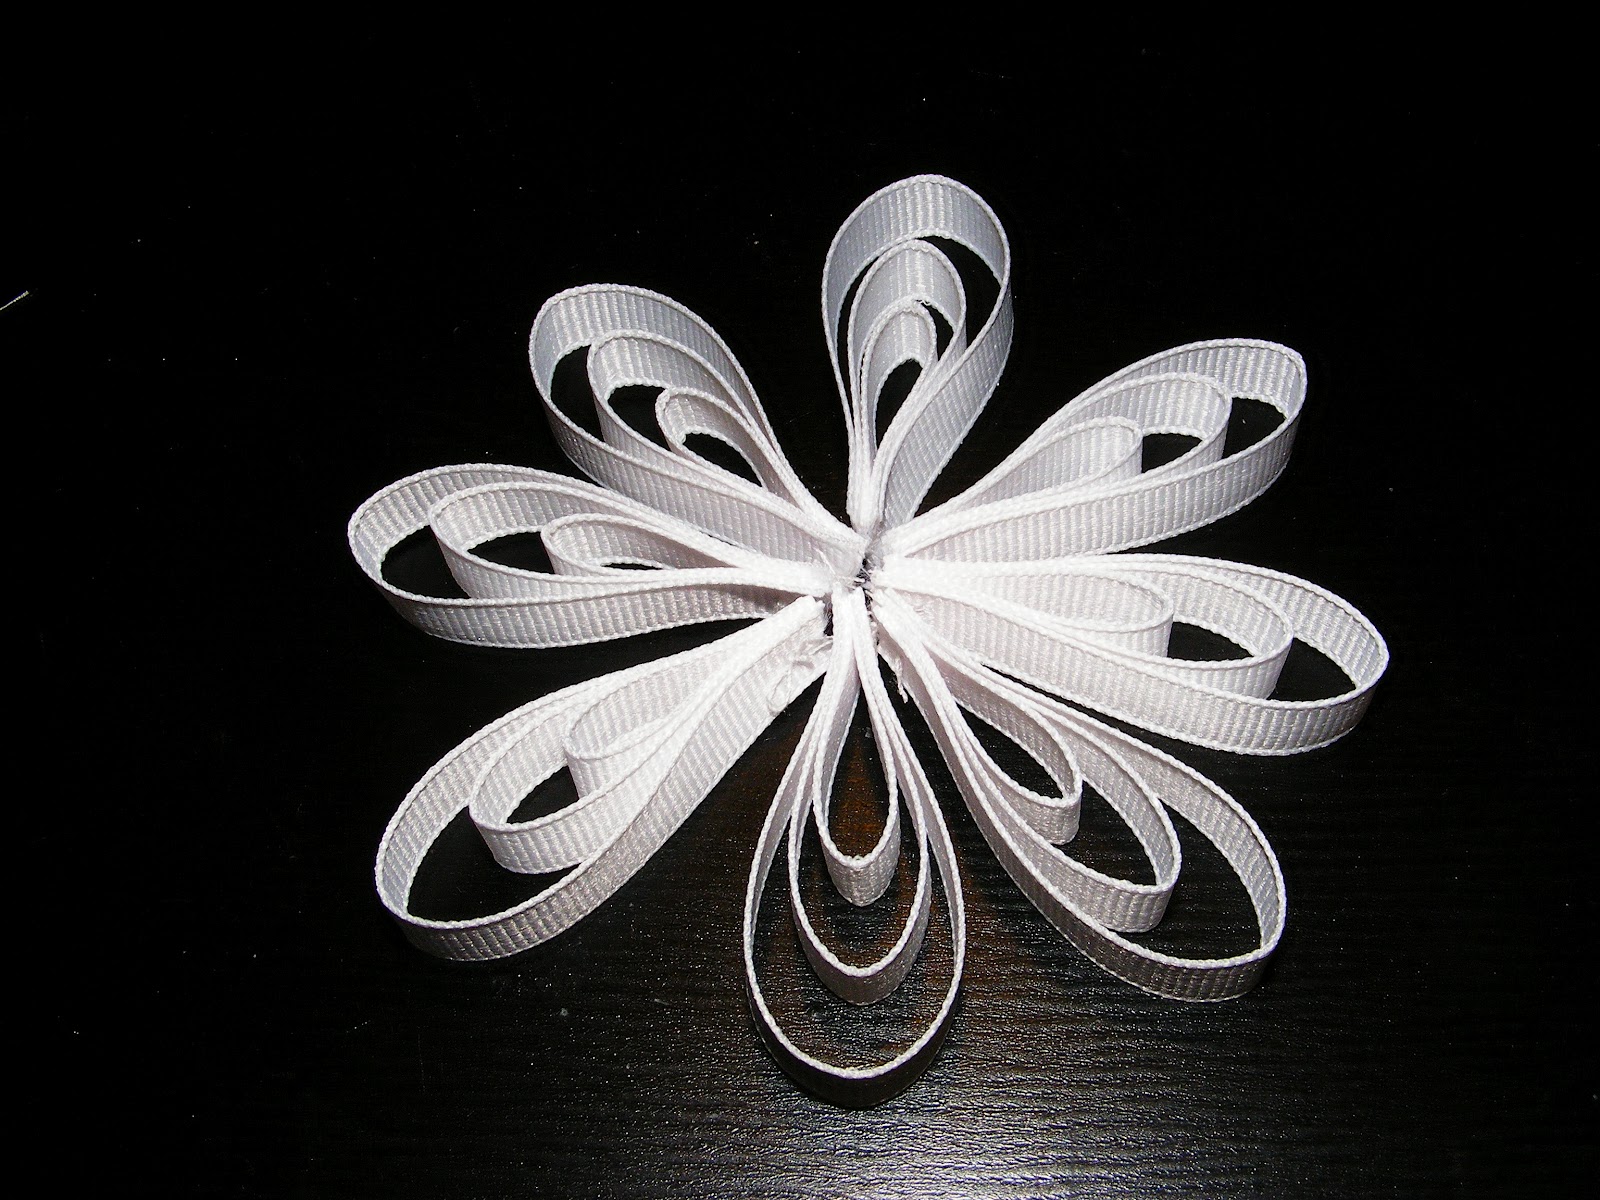
Next, cut a small circle of felt. This is the back of your ribbon flower. It will help hold it together.

Add a dab of hot glue to the tip of each "petal and place on the felt. I started with 2 directly across from each other and then added the 2 in the opposite direction, so it made a plus sign.

Continue adding the petals until all petals are glued together in the center.

Then add a dab of glue between each "petal" so that they are all attached. I added this between the longest ribbon pieces only.


Flip over your ribbon flower and attach your hair clip. I just ran a line of hot glue down the clip and attached to the felt.

Flip back over and add your embellishment to finish your flower.
I think it turned out super cute. It will be adorable attached to a crocheted headband for a baby or just clipped in an older child's hair.
These directions will give you a flower that is approximately 4 1/2" to 5" across. You could always start with a smaller outside piece and cut each ribbon piece down to make a smaller ribbon. You could even skip the 3rd ribbon and just use 2 pieces for each petal to make small clips for pigtails.
Let me know if you have any questions. If you decide to make your own, please send me a pic or a link to your blog post!
Monday, July 30, 2012
Thanks for hanging around!
Wow! Can't believe it's been so long since I've been on here. Scarlett is now 11 months and we have another one on the way. Due November 23rd. I have been creating all kinds of things, just haven't got on to share. I'm working on a few posts, so watch for them over the next few days! Glad to see a few have stuck around to read my latest rants. See you again soon.
A. Rose
A. Rose
Wednesday, March 21, 2012
7 months and counting...
Hello friends! It's been over 7 months since my last post. Things got crazy when little Miss Scarlett was born, so I didn't have time to post. Let me introduce her to you... (She will turn 7 months on the 26th. )


My crafty business has been growing like a weed. I'm actually not taking orders at the moment. We will be moving soon, so I have to finish all the orders before the move. Once we get settled in, I'll be back up and running. You can check out my Facebook page here: Designs By A Rose
I should be posting more in the coming days. Make sure you're a follower. I have a really awesome giveaway coming up next week!!!
Glad you guys stuck around. I didn't think I'd have any followers when I came back. My love to all of you!!!
Have a great day!
A.Rose
Friday, August 12, 2011
Spiced olive oil
My hubby likes to play chef…a lot. He’s an amazing cook and constantly comes up with gourmet meals for the daughter and I. So, when he decided to make his own spiced olive oils, I just thought…gotta blog it!
We found these oil dispensers at Wal-mart. They were $3.97 for a set of 2. We got 2 sets. The olive oil hubby used was just the Kroger brand of Extra Virgin Olive Oil. You could use whatever type you like.

He made four types…red pepper, garlic, basil, and rosemary. Those are the four main spices he uses in cooking. If you make these for your home, go with whatever spices you use regularly.
Measure the oil to fit in your containers. After washing the oil dispensers, we filled with water and measured how much would fit. Then poured that much oil in a saucepan. (Make sure to leave enough room to fit the spices as well) Add in the spice you are working on. The amount of spice you add is a personal preference. The more you add, the stronger the flavor will be in the oil. Bring the oil to a boil and then let simmer for 5 minutes. Cool to room temp, then pour in your dispenser.
Here is the red pepper and garlic versions. They will be cloudy at first, but after they sit overnight, the oil will clear up. The spices will fall to the bottom, if any is left in your oil. (You can always strain out the spices before pouring in the dispense…again, personal preference)


For the rosemary and basil versions, hubby put sprigs of the the fresh herb in the dispenser as well as in the boiling oil. It’s just prettier that way.


Sorry there isn’t a beautiful finished picture. You see those wonderful slices of French bread in the left corner??? Well, as soon as the basil version was done, we had to pour some over the bread and try it. Enough said!!!!
If you make your own, let me know how it turns out. We actually made these a couple months ago. I wanted to see how we liked them before posting this. Let’s just say We barely have any left! Time to make more!!!!
Thursday, August 11, 2011
Another photo frame
On the same trip to Hobby Lobby that we found the black glitter frame, we also found a shiny hot pink frame. Of course the daughter and I had to make our own version of that as well!
Using another Goodwill frame, this one cost $2.00 because it’s heavy and pewter,

We painted it hot pink. This was done with the $1.29 acrylic craft paint. We actually had to use a few coats to cover the pewter. I didn’t think to spay primer on first. Oh well, you live and learn!

Let the acrylic paint dry completely.

Once it was completely dry, we sprayed clear gloss over it.

Gotta love these cheap and easy redos!
Now just to find the perfect pics to put in daughter’s 2 new frames…
Wednesday, August 10, 2011
Glittered photo frame
The daughter and I were walking through Hobby Lobby recently. We came across a really cute photo frame. It was all sparkly in black glitter. Daughter wanted it…I didn’t want to spend $29.99 on it…so we came up with our own.
If you haven’t figured it out by now, I LOVE Goodwill! I am constantly finding items to redo. In fact, I go to their photo frame department on a regular basis and just pick up every interesting frame they have! The one in my town keeps a huge stock of them and they’re always 50 cents to $2.00 a piece! On top of that, if you catch them at one of their 50% off sales, you have 25 cent frames! Come on people…where are you going to find that deal elsewhere?
This particular frame would be one of those 25 cent frames! It didn’t come with a back or glass, but that’s easy to fix! I’ll do a post on that one day, but for now…just know a piece of a cardboard box works wonders to go in the back and you can get a piece of glass cut at Lowe’s or Home Depot for pennies!
On with the frame redo…
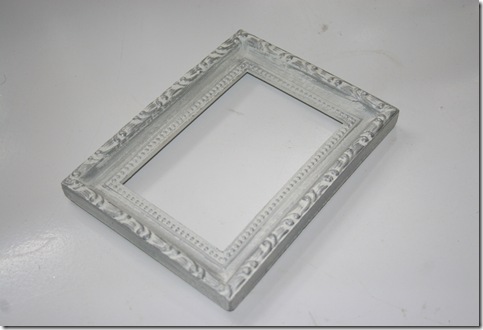
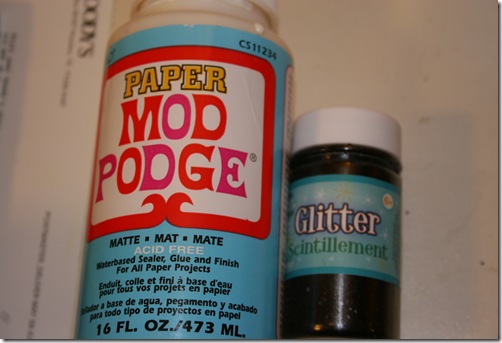
To make my simple white frame all pretty and glittery, I used Mod Podge and Glitter. (both purchased at Hobby Lobby, but you can find them at Wal-mart, Michael’s or your fav craft store)
I forgot to snap a pic, but I spray painted the frame black before we started the next step.
To make it super easy for my daughter to do, I took a small plastic cup, poured in some Mod Podge and some glitter and mixed it up.

Since the Mod Podge will dry clear, you can just paint it on. You can see where the frame was painted black in this pic.

Once the whole frame is covered in the Mod Podge/Glitter mixture, let it dry for a few hours. We let ours dry overnight.

To save the leftover mixture, just place the cup in a sandwich bag and zip. It will stay moist for days. I really don’t know how long it will actually last, because I usually toss it when I’m done with my project, but I know I’ve kept it this way for a couple weeks.

If your frame isn’t as sparkly as you’d like, you can always add another coat of the Mod Podge mixture and then just drizzle glitter over the top. That’s what we did.

When it’s completely dry, shake off the excess glitter and you’ll have a super cute sparkly frame for no where near $29.99!!!

Dear Daughter loves it!!!!
I'm linking up with Domestically Speaking's Power of Paint party. Go check out all the cool paint redo's!
If you haven’t figured it out by now, I LOVE Goodwill! I am constantly finding items to redo. In fact, I go to their photo frame department on a regular basis and just pick up every interesting frame they have! The one in my town keeps a huge stock of them and they’re always 50 cents to $2.00 a piece! On top of that, if you catch them at one of their 50% off sales, you have 25 cent frames! Come on people…where are you going to find that deal elsewhere?
This particular frame would be one of those 25 cent frames! It didn’t come with a back or glass, but that’s easy to fix! I’ll do a post on that one day, but for now…just know a piece of a cardboard box works wonders to go in the back and you can get a piece of glass cut at Lowe’s or Home Depot for pennies!
On with the frame redo…

To make my simple white frame all pretty and glittery, I used Mod Podge and Glitter. (both purchased at Hobby Lobby, but you can find them at Wal-mart, Michael’s or your fav craft store)

I forgot to snap a pic, but I spray painted the frame black before we started the next step.
To make it super easy for my daughter to do, I took a small plastic cup, poured in some Mod Podge and some glitter and mixed it up.

Since the Mod Podge will dry clear, you can just paint it on. You can see where the frame was painted black in this pic.

Once the whole frame is covered in the Mod Podge/Glitter mixture, let it dry for a few hours. We let ours dry overnight.

To save the leftover mixture, just place the cup in a sandwich bag and zip. It will stay moist for days. I really don’t know how long it will actually last, because I usually toss it when I’m done with my project, but I know I’ve kept it this way for a couple weeks.

If your frame isn’t as sparkly as you’d like, you can always add another coat of the Mod Podge mixture and then just drizzle glitter over the top. That’s what we did.

When it’s completely dry, shake off the excess glitter and you’ll have a super cute sparkly frame for no where near $29.99!!!

Dear Daughter loves it!!!!
I'm linking up with Domestically Speaking's Power of Paint party. Go check out all the cool paint redo's!
Tuesday, August 9, 2011
Zebra print corkboard
My daughter LOVES zebra print and hot pink! Her bedroom is done with zebra print, her backpack (seen yesterday on here) is zebra print, and who knows what else she has that’s zebra print. So, in keeping with the zebra print theme…
I found a corkboard at Goodwill for $2.00.

Took some leftover zebra print fabric from the chair make-over, and a 3.00 roll of sparkly hot pink ribbon…
Cut and hot-glued the fabric and ribbon down…

Made a pretty bow for the corner…

Stuck in some colorful push pins…

And called it cute!!!
Daughter LOVES it!!!

Me too!
Subscribe to:
Posts (Atom)